A few years ago I wrote an article explaining how to save server space and shorten download times by optimizing images before uploading them to WordPress (Unlimited Space… Is Something We Don’t Have). This one will be similar but with two important differences: 1) This article will show a new free optimizing tool, and, 2) It will be more recent.
 TLDR summary: Use Squoosh.
For those of you still reading, Squoosh.app is a handy online service for optimizing images before posting them anywhere. Phones and cameras produce very high resolution photos with enormous file sizes. Posting them directly on the web will force visitors to your site to wait for the whole thing to download, and that’s usually not why they came to your site in the first place. So it’s important for you to do the heavy lifting so others can benefit from your labors.
Basically, the process involves uploading the image to the Squoosh site, optimizing it, and then downloading the new version which you can then upload to your website. It’s easier than it sounds, so let’s walk through all that with an example using a photo I took last weekend.
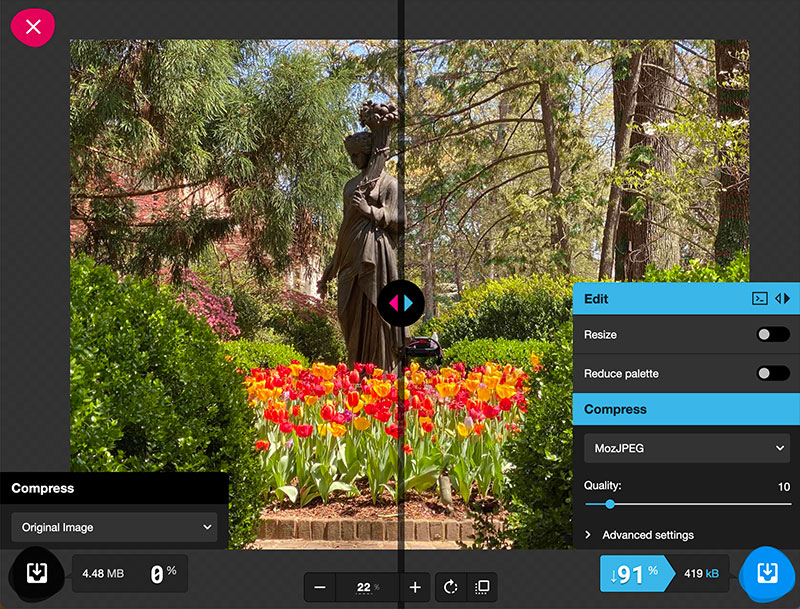
This is a screenshot from after I uploaded my photo to Squoosh. On the left you have the original image quality, and on the right you have the optimized version. Before optimizing, dragging the divider back and forth shows no difference in the “before and after” images (at least to my eye). On the bottom left you can see that the original photo’s file size is a hefty 4.48 MB. On the right, you can see where I’ve adjusted the quality way down and that the new file size will be 419 kB; a 91% decrease! That’s about a tenth of the original size, and I still can’t see any loss of clarity. All I need to do at this point is use the download button to the right of the new file size and save the new file back to my machine.

But, what if I’m a stickler about this kind of thing (which I am) and I want to do an even better job? The new image is still set at the original resolution, which in this case 4032 x 3024 pixels. To give you a sense of how big that is, my laptop screen is only 2880 x 1800 in size, so at full scale, I can only see a portion of the actual photo! And now that its image quality is at only 91%, it looks really blotchy at full size (see photo).
The extra step we ought to take is to resize the image as a part of optimizing it. By scaling it down to the approximate size it will actually appear on the web, we can shave off a few more bytes and speed up its rendering by a fraction of a second or more. 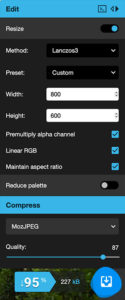 The trick here, though, is that when you shrink the image, you’ll need to crank the quality back up. You can afford to do that because a smaller resolution image takes up a lot less space anyway. The next screenshot shows how I’ve set the width to 800 (the largest that I wanted to display the photo). The height automatically adjusted proportionately down to 600. And when I boosted the quality up closer to 100%, the file size adjusted to 227 kB, which is nearly half what the already-optimized image size was, and a mere 5% the size of the original photo from my phone.
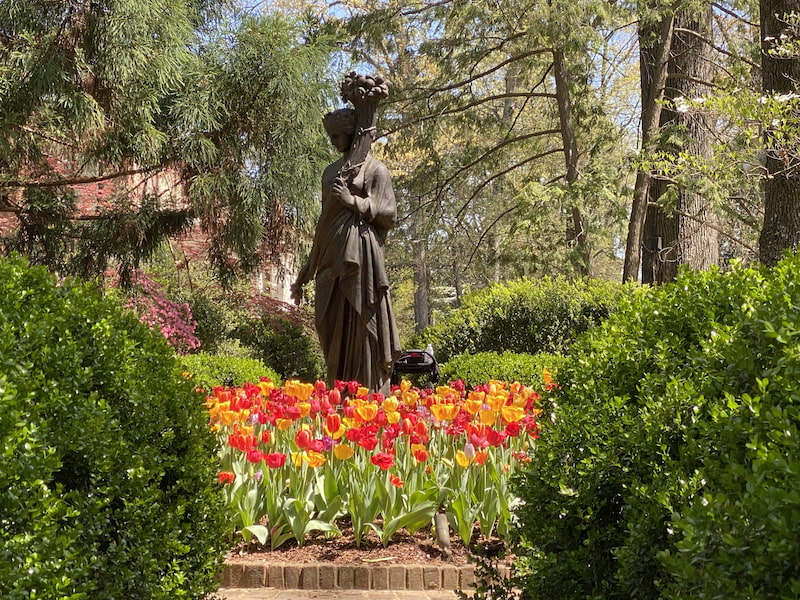
So here is the final version of that photo for your inspection.
For those of you who use Photoshop, you probably already know about the “File / Save for web…” option which performs a similar function with less going back and forth. But if you don’t have Photoshop, you should find Squoosh easy to use. Whichever method you use, it is worth the extra effort in making your audience happier.